Email is used to reach Contacts on their email address. Using the Outbound Email Element, you can send a a personalized Email message to designated Contacts within your database. You'll need an email address for each of the Contacts (often stored in the ##email## field), but don't worry if you don't have an Email address for your Contacts: simply capture it on any appropriate Microsite pages.
Before getting started, you should have completed the following tasks:
1. Configure a Target Audience
2. Drag the Email App onto the Studio Canvas
3. Configure the General tab
4. Configure the Settings tab
5. Click the Schedules tab - Add a basic schedule
6. No configuration is necessary under the Events tab
7. Publish your Program
To abide by CAN-SPAM laws, your emails should provide Contacts a way to remove themselves from any future email communication. To do so, insert the following HTML:

The RedirectURL parameter controls where the Contact lands after clicking "Unsubscribe". This can be a page on any website or a special Microsite page you create.
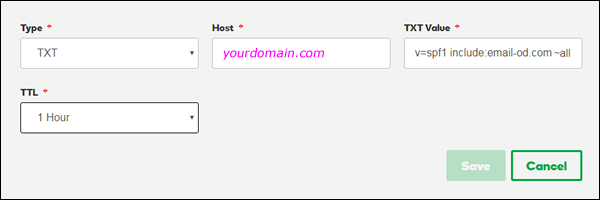
Typically, when messages are being sent from one address to another within a domain that is managed by a corporate mail server, those messages never leave the internal mail server. But when sending emails from Studio, these messages are coming into the mail server from the "outside world" while claiming to be on behalf of whateverdomain.com. It is likely that the receiving mail server will determine these emails are spoofing the company's domain and will reject them. By adding an SPF (Sender Policy Framework) record to the domain, it is shown that the domain owner has validated the emails that come from Studio.
Instructions:
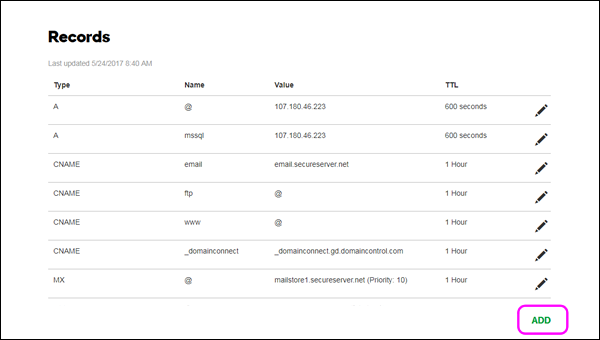
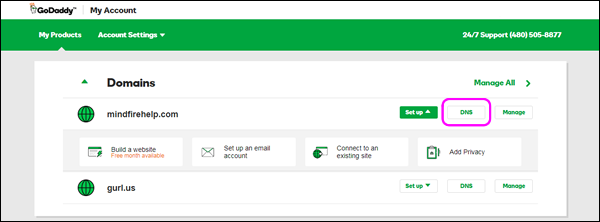
1. Log in to your domain host and find the area where you can edit the domain's DNS settings
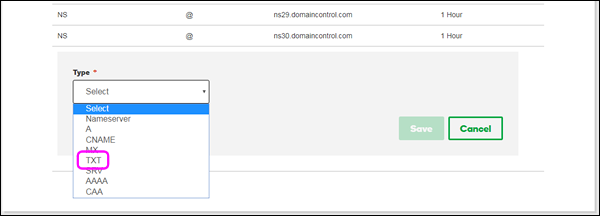
2. Add a TXT Record: