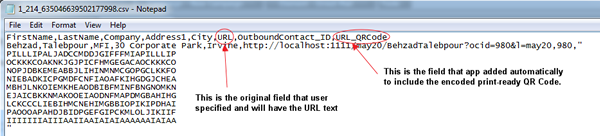
This outbound application (OutboundApp) creates a zipped CSV file that includes all the requested contacts data for the specified fields and delivers it to the user through an email and/or FTP. An optional and print-ready text-base QR Code can be included in the file.
In order to add a Direct Mail OutboundApp to your campaign and set it up properly before publish, please follow these steps:
1. Open a new campaign or an existing one
2. Click on the Target Audiences menu and drag and drop a Target Audience element onto the canvas
3. Navigate to the Settings tab and set a filter as desired
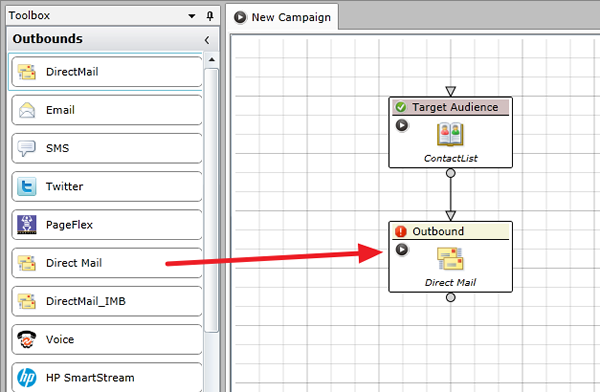
4. Click on the Outbounds menu and drag and drop a Direct Mail element onto the canvas and connect it to the above Target Audience element
5. Double click on the Direct Mail element and change its name, if desired, then navigate to the Configurations tab
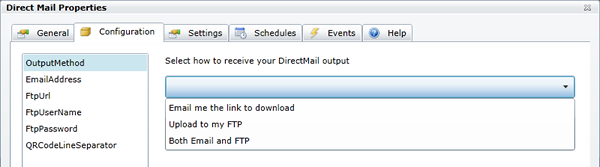
6. Click on OutputMethod field and select the delivery method you would like to receive the output CSV file. Your options are: Get the link to the zipped file through an email, Get the file through an FTP server, or both methods.
7. Click on EmailAddress field and provide one or more email address(es) that you wish to be notified when the output file is ready. Multiple email addresses can be separated by either comma or semi-colon. If you have chosen to receive the output file through an FTP server, please provide values for FtpUrl, FtpUserName and FtpPassword as well. Otherwise, leave these fields blank.
8. Depending on the tool that you are going to use to process the CSV file for the print purposes, you should either leave QRCodeLineSeparator blank or specify a value.
If your tool can handle the Carriage Return (a combination of char(13)+char(10) or \n\r), then leave this field blank
Otherwise, provide a value that you can recognize accurately later on while you are processing the CSV file. These characters should still be converted to Carriage Return before the QR Code can be printed properly.

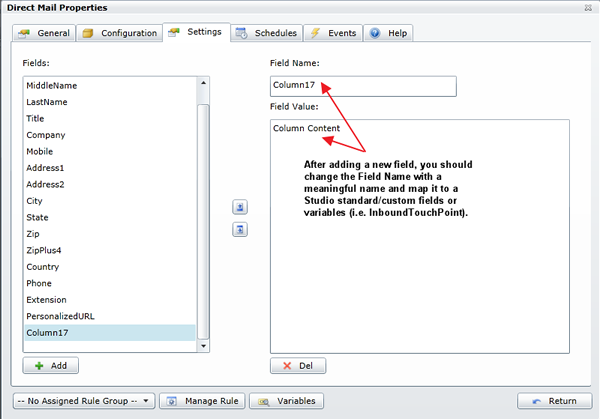
9. Navigate to the Settings tab. Specify the field names that you are going to use in your print piece and map them to the appropriate Studio fields. There are some fields already there by default, however, you can modify them as you'd like.
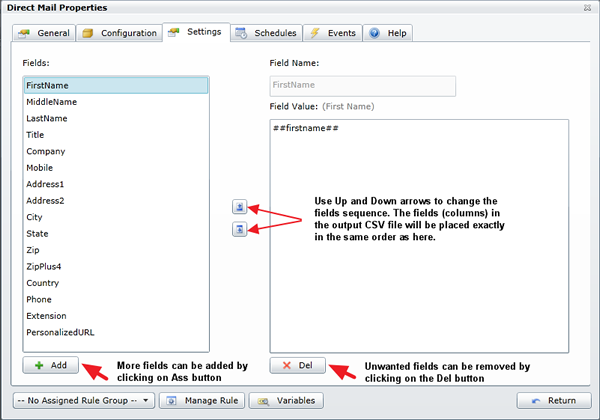
If you'd like to add more fields, click on the Add button, then modify the Field Name and Field Value. Make sure to wrap Studio fields with double # (i.e. ##FieldName##). You can repeat this step as many times as required.
If you do not need some of these fields, first click on that field, then click on the Del button. Note: There is no confirmation for this action.
If you'd like to modify the order of the fields, first click on that filed name, then click on one of the Up or Down arrows in the middle of the window.
10. Click the Schedules tab - Add a basic schedule
11. No configuration is necessary under the Events tab
12. Publish your Program