This document provides help and step-by-step instructions for preparing an HP print template as well as configuring the HP SmartStream OutboundApp within MindFire Studio campaigns. This outbound app allows you to upload a new print template or manage templates you have already uploaded.
Before getting started, you will need the following:
1. Design your document with Adobe InDesign CS6 (or newer)
2. From within HP SmartStream Designer plugin, add the necessary variables and rules to your document and save it
3. Go to Tools menu and click on Pack Job menu
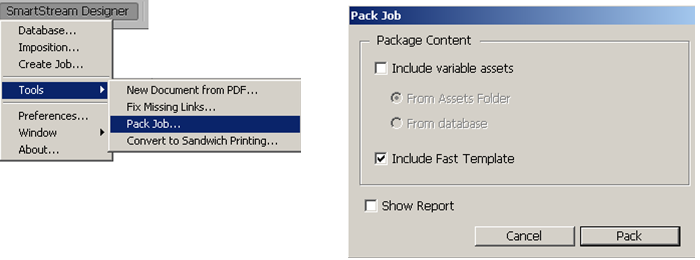
HP SmartStream Designer Plugin's Pack Job menu and window: This menu will be used to pack a document for being used in the HP SmartStream OutboundApp.
4. In the Pack Job window, check Include Fast Template box and click on
5. An .hpd file should be now created that can be used for print purposes through MindFire Studio campaigns
In order to add a print piece to your campaign, please follow these steps:
1. Either start a new campaign or open one of your saved/published ones
2. From Outbounds menu, drag and drop an HP SmartStream element to the canvas
3. Connect this element to either a TargetAudience or a Trigger element
4. Double click on the HP SmartStream element to open its properties window
5. If desired, you can modify the element's name in the same way you would for all other elements, then Navigate to the Configuration tab
6. If this is the first time using an HP SmartStream element, if you would like to upload more print templates to your account, or if you would like to view a sample PDF of print available print templates (if any), click on Template File Name field, then click on the link under the drop down
7. From Template File Name field, select the print template you would like to be used for print purposes through your campaign
8. From Is Template Imposed? field, select Yes, if you have set up impositioning through HP SmartStream Designer plugin in Adobe In-Design. Otherwise, select No. Please refer to Image_12 for a sample impositioned output.
9. Click on Delivery Method and select the method you would like to receive the output file (this can be either an email, a FTP or both)
10. Based on your selection in the previous step, provide values for the remaining fields (Email Address and/or FTP URL, FTP User Name and FTP Password)
11. Navigate to the Settings tab
12. Based on your print template selection under the Configuration tab, you need to add all the variables used in the template and map them to their equivalent fields from Studio. Repeat the following steps to add as many fields as required:
13. Navigate to the Schedules tab, add a schedule and click on
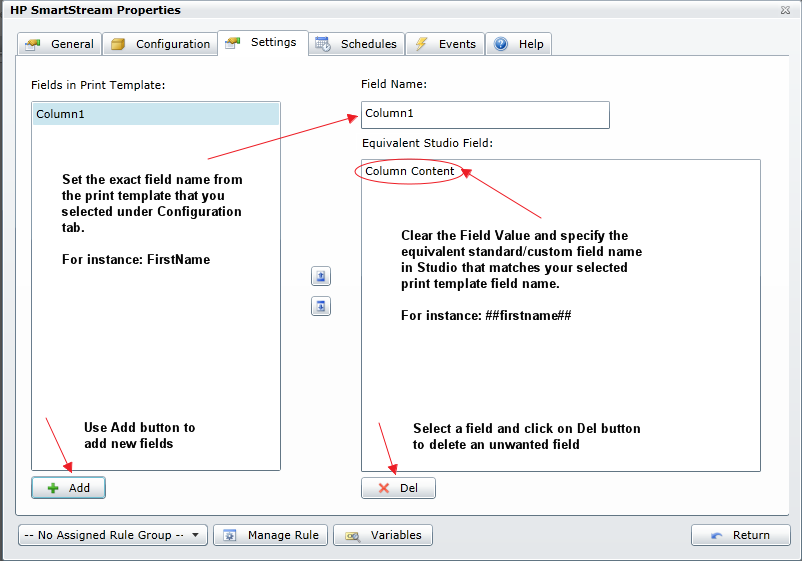
HP SmartStream's Settings tab is where you map the print template variables with their equivalent standard/custom Studio field names.
The HP SmartStream Outbound App allows you to upload a new print template or update/delete/preview the ones that are already uploaded.
In order to bring up the Template Upload page to upload new template(s), or later on, to manage your uploaded templates, follow these steps:
1. Open a new campaign
2. From the toolbox, click on Outbounds and drag and drop an HP SmartStream element onto the canvas
3. Double-click on the element and navigate to the Configuration tab
4. Click on Template File Name (if it is not highlighted) field, and then on the link under the drop down
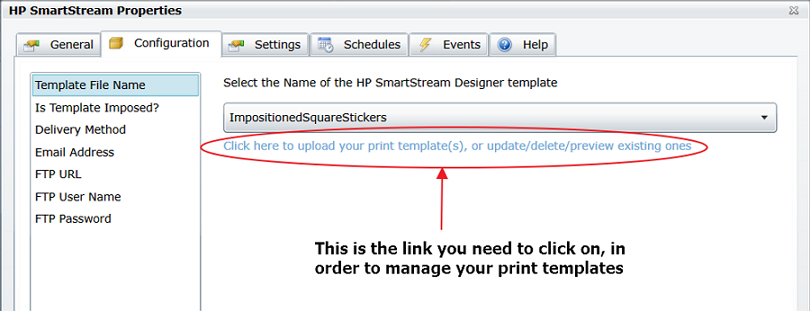
In order to Upload a new print template or manage the existing ones, go to the Configuration tab of the HP SmartStream element and click on Template File Name field in order to see the above link.

When you land on the TemplateUpload page, you need to select an action; upload a new print template, or manage the one you have already uploaded.
4a. Depending on what you plan to do, read the related sub-section below
5. After you are done, close the window to return to the previous (Properties) window
I) Uploading a New Print Template:


II) Updating Existing Print Templates:
III) Deleting Existing Print Templates and Their Preview Files:
Notes
The output (rendered PDF) file will be delivered to you either by sending an email with a link to download the file to your computer or by copying it to your FTP server. This depends on the option you have selected from the Delivery Method drop down in the Configuration tab of the HP SmartStream element's properties window. The email goes to the address that is specified in the Email Address field in the same tab as Delivery Method. You can provide multiple email addresses (separated with a comma or semi-colon). The email output looks like this:
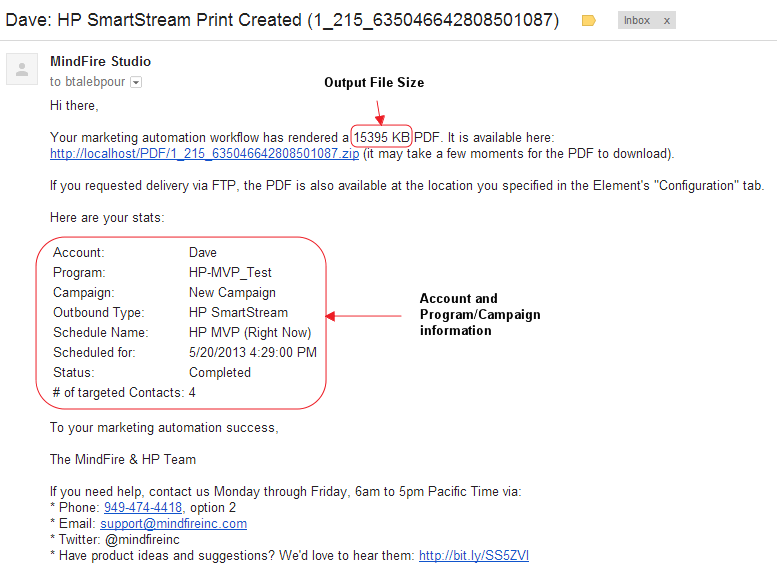
This email is sent out after the print template has been rendered successfully.
In here we just provide you with some screenshots of different menus in the HP SmartStream Designer plugin to give you a general idea of how this plugin can assist you to design your artwork and add variable pieces to it.
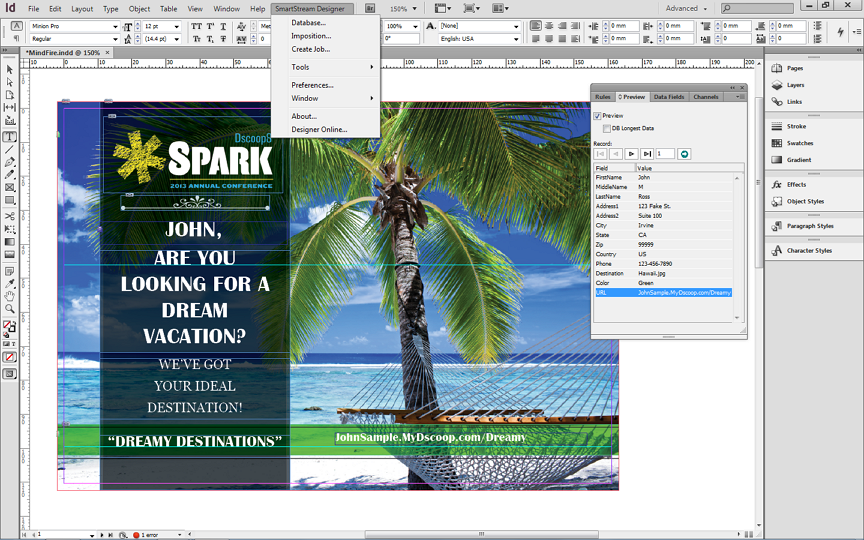
Sample artwork: The graphics designer designs the background first, then adds the variable components. He/she can then, preview the expected result in InDesign.
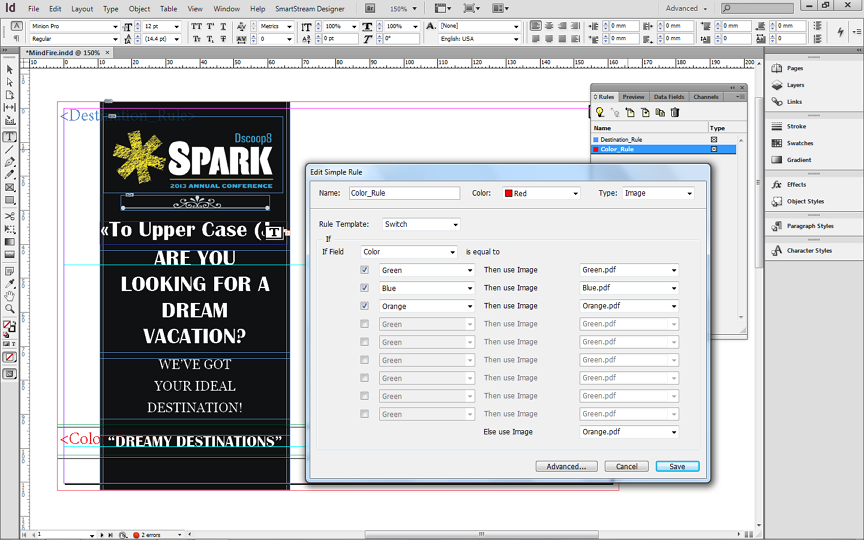
Setting the Colors: A designer rule is defining the assignment between the color and a PDF that draws the color.
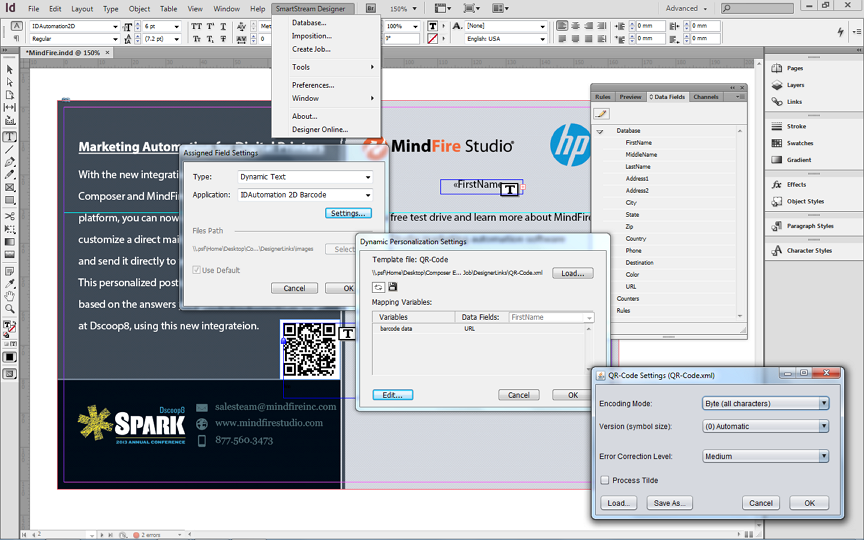
Define the QR Code.
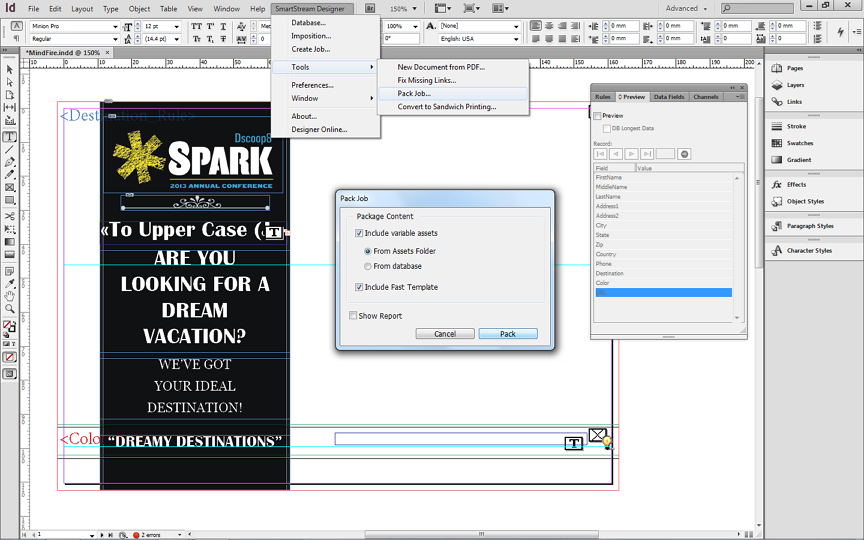
After your artwork is complete and saved, you need to pack it in order to create an HP Document (HPD) file for using in MindFire Studio.
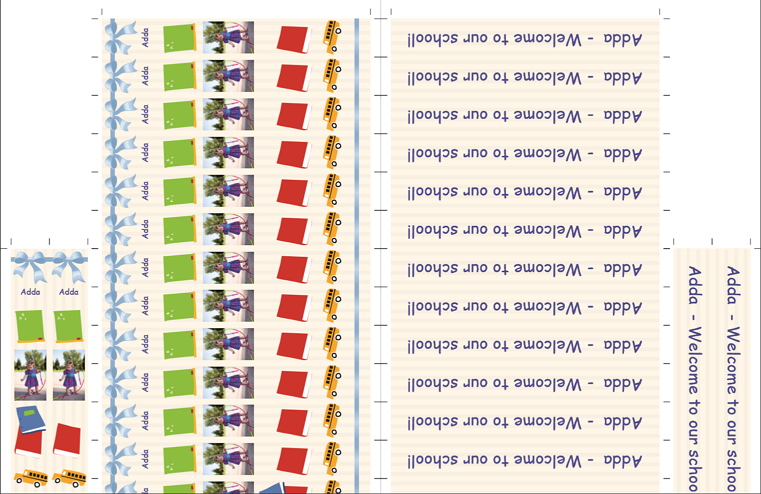
Sample impositioned PDF rendered by HP SmartStream Composer: Left side is the 1st page of the PDF and right side is the 2nd page.